How To Whiten Teeth With Photoshop

hqdefault


How often do you see a photo of yourself and wish you had whiter teeth? Photoshop CC makes it easy to get those pearly whites with layer adjustments and vibrance.

Go to Layer > New Adjustment Layer > Vibrance, and reduce the vibrance to -60.

Then, choose the Vibrance Layer in the Layers Panel, and choose Layer Mask.

Next, press Command/Control I to invert, which fills the layer mask to hide the adjustment made to the Vibrance Layer.

Finally, use the Brush Tool with a small, soft-edged brush set at 50% opacity and paint over the teeth that need whitening.

Aside from that we’re gonna show you a easier ways to whiten teeth on photoshop !

Using the Hue/Saturation Tool

Right-click the Lasso Tool and choose select the Polygonal Lasso Tool.

image12

Although teeth are slightly rounded at times, this tool will work great for what we want to do.

Click on a corner of the mouth where the tooth and gum meet, and then move the mouse to a point where you can cover the tooth. Keep moving along the lip or gum (wherever the teeth happen to rest in the photo) until you cover the whole mouth.

Partway through, the canvas should look similar to this:

image13

When the selection is completed, it shall look like this one:

image14

Now right-click in the teeth area and select Refine Edge. Ensure the same lasso tool is still selected when right-clicking.

Slightly adjust the Smooth factor so the selection edges aren’t sharp and unrealistic looking.

image15

Press OK and then head up to the Hue/Saturation item in the Image > Adjustments menu.

image16

The adjustments made in this window will change the tone of the existing color of the teeth. I find this to create the most natural-looking white teeth in Photoshop.

What you want to do is adjust the Hue as a decrease to the point of the teeth making a near red color. Then decrease the Saturation to reduce the red color and bring it to a more white or grey color. Finally, (and be stingy here) increase the Lightness. This last adjustment isn’t always necessary but it does add a nice bright feel to the teeth. Don’t overdo it, as it can easily make the image rather unrealistic.

image17

Our final result when using the Hue/Saturation tool is a quick and easy bright color to an otherwise slightly yellow mouth.

image18

Cool Tip: Press Ctrl+D to quickly deselect a selected image, returning it to a normal appearance.
Photoshop Tips and Tricks for Beginners: Custom Shape Tool

Custom Shape Tool

Did you know that in addition to photo editing, you can also easily add shapes and design elements to your Photoshop creations by using Custom Shape Tool?  The Tool Panel has all of the basic shapes you need like square, line, circle, ellipse etc in addition to a whole slew of extended options. The Custom Shape tool is easy to find in the Options Bar, represented by an icon that kind of looks like a puzzle piece.

Access even more shapes by clicking again on the small arrow on the right side of the panel. If you are looking for banners, speech bubbles or arrows of all kinds, this is just the tool for you.

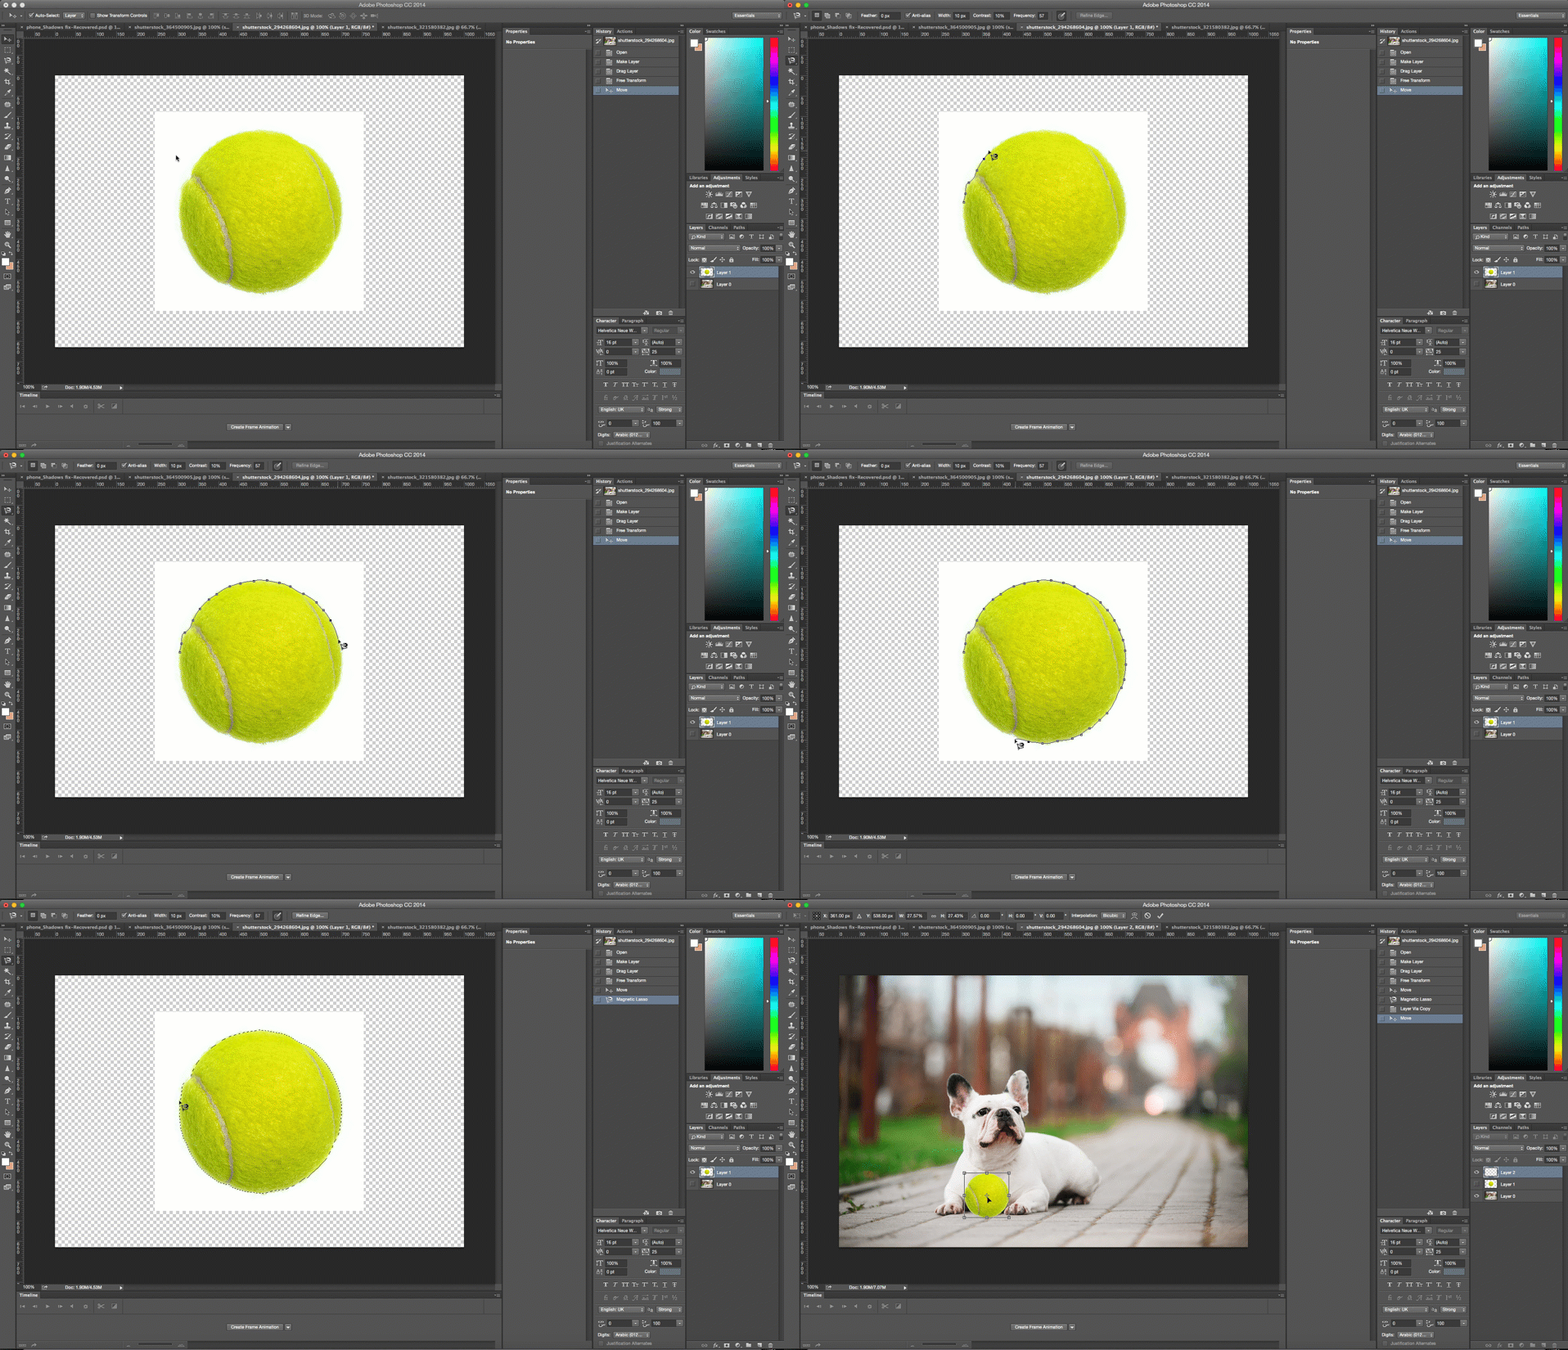
Photoshop Tips and Tricks for Beginners: Magnetic Lasso Tool

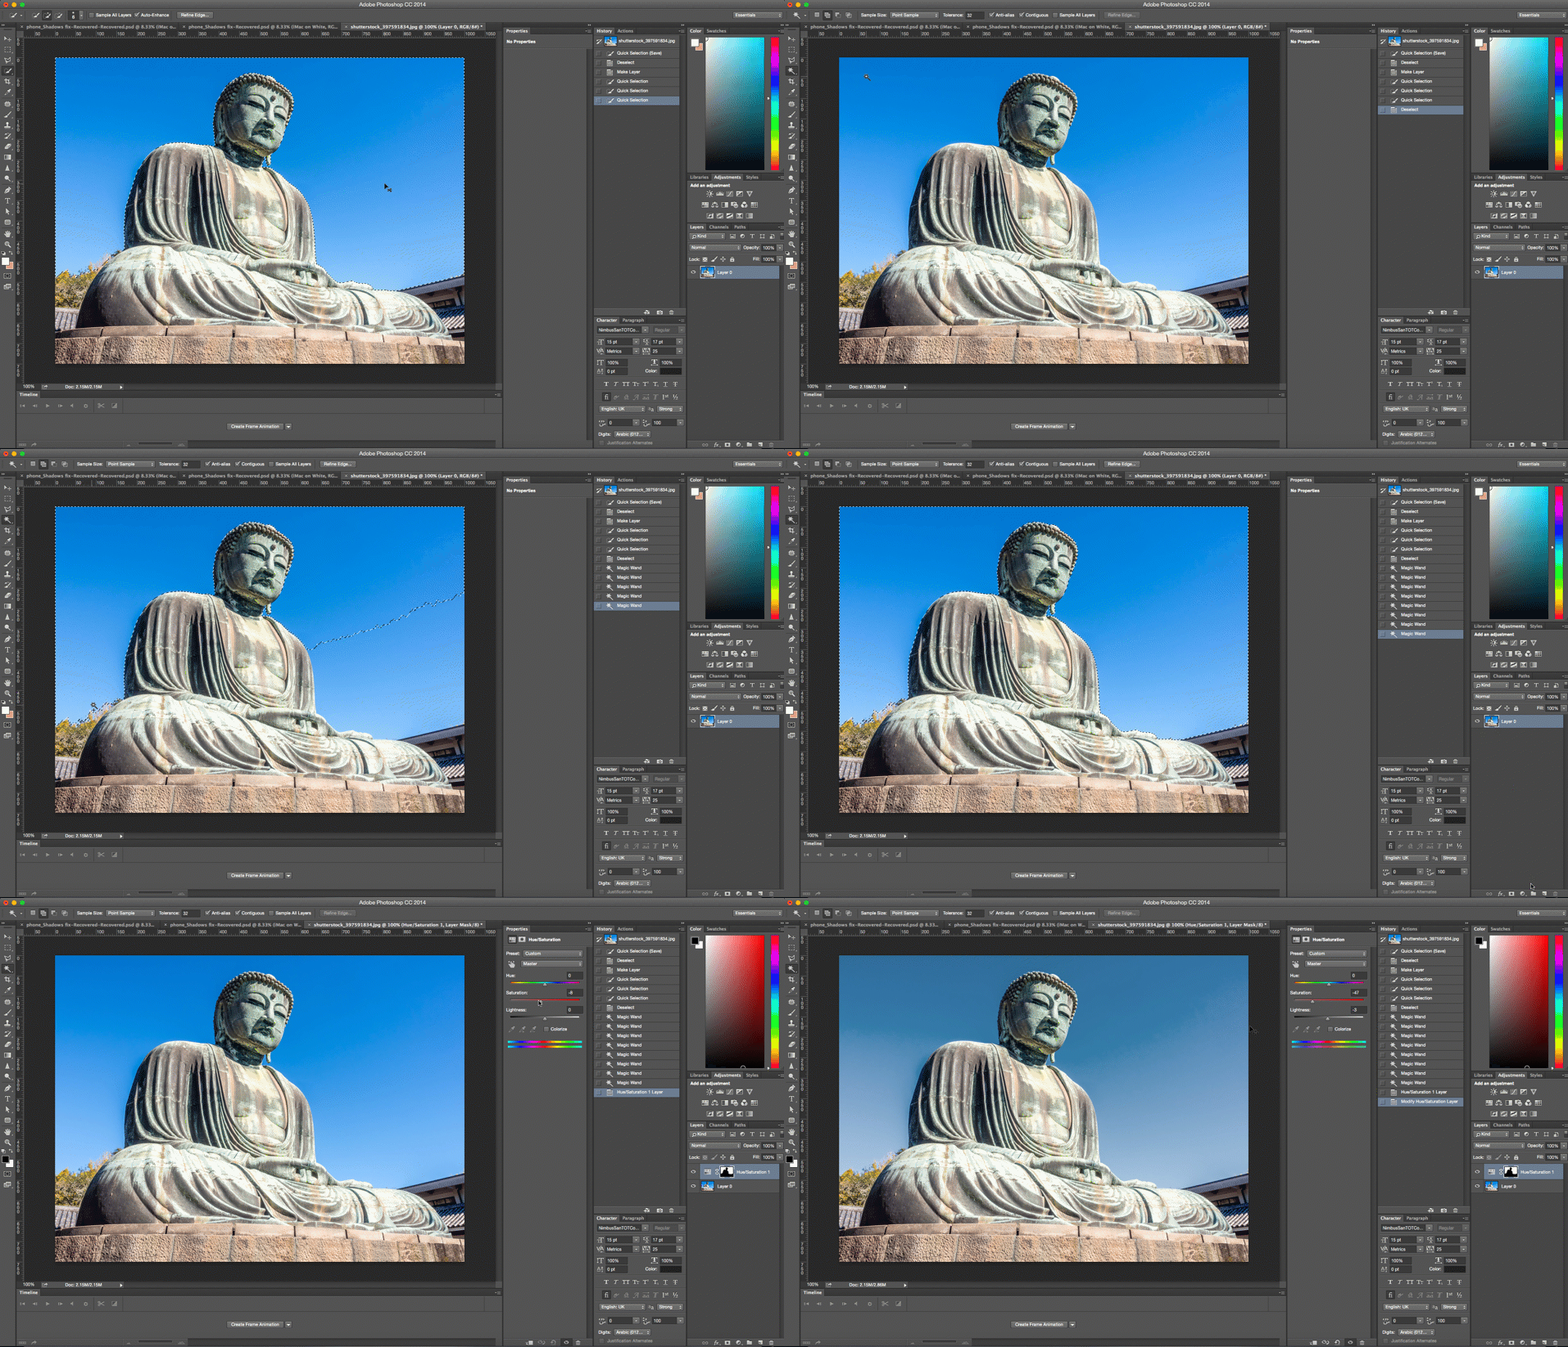
The Magic Wand is another selection tool, ideal for when you are working with a background that is more monotone and consistent (like a solid color or clear blue sky).

The Magic Wand tool is most often used to switch up backgrounds or large color blocks. To use it, choose the Magic Wand tool from the tools panel and click on the part of the image you want to select. Make sure that you toggled the “add to selection” option on the top bar (icon of two squares) so that you can move forward with switching up the colors and tones of your selection.


Photoshop: Tips and Tricks for Beginners

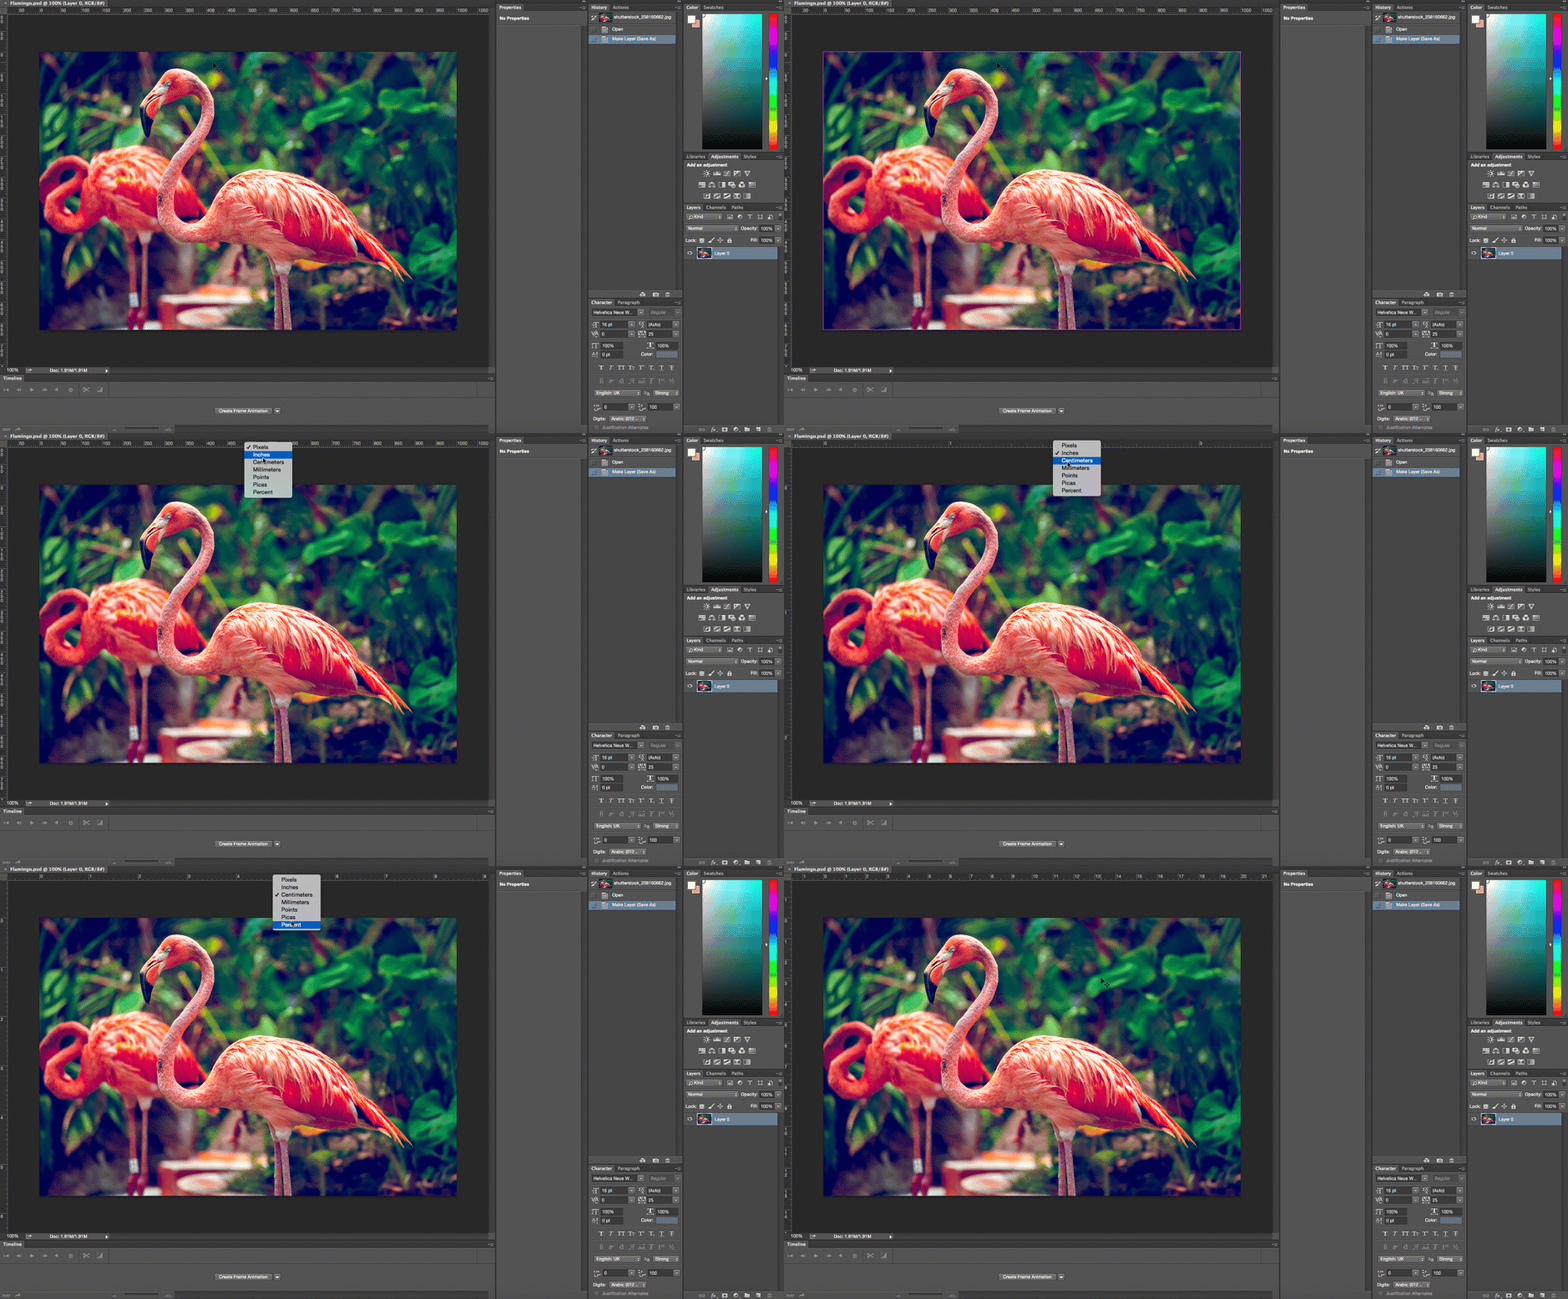
Change the Unit of Measurement

Change Measurement In Photoshop

A short and quick way to switch between units of measurements that you’re working with is to place your cursor on one of the rulers on your grid (press Ctrl + R to show or hide the rulers), and right click, then choose a new unit from the context menu. There you’ll find a wide variety of units, from centimeters to pixels, millimeters, points and even percents.

Shoot Hazy and Ethereal Photos Using a Sandwich Bag and Colored Markers

LU9BCyF-copy

Photographer Jesse David McGrady has a super simple trick for adding a hazy, ethereal effect to your photographs: wrap a plastic sandwich bag around your lens. It sounds ridiculous and silly, but the results you get are actually quite nice!

First, find yourself a sandwich bag — those thing plastic bags that you carry sandwiches around in.

step11

On the closed side of the bag, use your hands to tear a hole. Don’t use scissors, since you’ll want the edges to be rough, uneven, and slightly random.

step31

Take the open end of the bag and slide it over your camera lens, with the hole end extending a little past the end of your lens. You want to make sure it can be seen in your viewfinder. Don’t cover up the middle portion of the frame, since you’ll want a clear section to see your subject through.

sample14

Voila! You’ve got yourself an instant hazy, retro, light leak look for just pennies:

Okay, a sample photograph of an empty smoothie glass is a bit lame, but check out what McGrady has been able to do using this “hack”:

jwoMMtf-copy

Zs2VmKX-copy

To customize the look you get, you can take a colored pen and draw over the plastic bag, adding color to certain parts. Here are a couple of photos shot by McGrady using a baggie that was marked with purple:

You can find more of McGrady’s photographs shot using this trick/technique/hack here and here.